
Have you ever watched someone create gorgeous mehndi patterns and thought, “I could never do that”? I completely understand that feeling. But here’s the truth—applying a beautiful front hand simple mehndi design isn’t as difficult as it looks. You just need to start with the right patterns and a little bit of patience.
I remember the first time I tried applying mehndi myself. My hands were shaking, the lines were wobbly, and I almost gave up. But then I realized something important: nobody expects your first attempt to look like a professional’s work. Once I let go of that pressure and focused on simple patterns, everything changed.
Today, I want to share some genuinely easy designs that won’t frustrate you. These are the same patterns I started with, and they helped me fall in love with mehndi art.
Why Your Front Hand is Perfect for Practice
Your front hand simple mehndi designs is actually the easiest place to start learning mehndi. You can see exactly what you’re doing, which helps tremendously when you’re still figuring out cone control. Unlike the back of your hand, the front has natural lines and curves that guide your designs.
Plus, simple front hand mehndi looks elegant and complete even with minimal coverage. You don’t need to fill every inch of space to create something beautiful. Sometimes the empty areas make your design stand out even more.
What Makes a Design “Beginner-Friendly”?
Before we jump into specific patterns, let’s talk about what actually makes a design easy. A beginner friendly mehndi design has a few key features: fewer elements, forgiving shapes, and room for small mistakes that won’t ruin the overall look.
Designs with lots of open space are your friend right now. They look intentional and modern, plus they’re much faster to apply. You’ll also want patterns that use repetitive elements—once you master drawing one leaf or petal, you can repeat it throughout your design.
Starting with Minimal Mehndi

Let me tell you about minimal style because it’s genuinely perfect for first-timers. This approach focuses on delicate, spaced-out elements rather than heavy coverage. Think of it as the “less is more” philosophy applied to mehndi.
Try this: Draw a thin curved line from your wrist that travels up to your middle finger. Along this line, add small leaves every inch or so. At the base of your finger, draw a simple circle and fill it in. That’s it—you’ve created an elegant design in under ten minutes.
The beauty of minimal patterns is that they look sophisticated and intentional. Nobody will know you chose this style because you’re a beginner. They’ll just see a trendy, modern design.
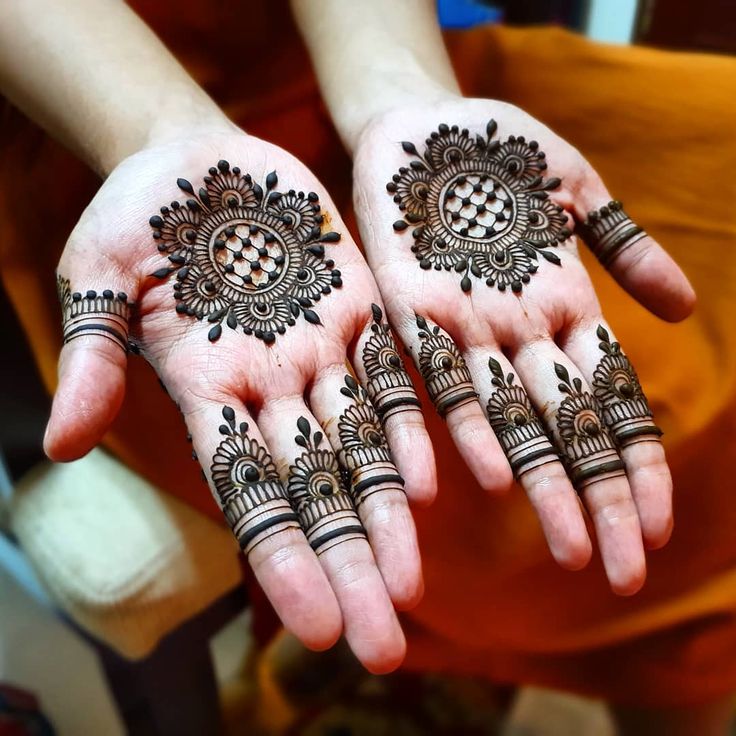
Floral Designs That Won’t Overwhelm You
Flowers are everywhere in mehndi art, and for good reason—they’re universally loved and surprisingly simple once you understand the basics. A front hand simple mehndi design featuring flowers can range from a single bloom to a small garden, depending on your comfort level.
Start with the easiest flower: a simple five-petal design. Draw a small dot in your palm. Around it, draw five U-shapes that touch at the center. Add tiny lines inside each petal for detail. See? You just made your first mehndi flower.
The front hand floral mehndi style doesn’t require botanical accuracy. Your flowers can be imaginary creations. In fact, some of the prettiest mehndi flowers don’t exist in nature at all. This gives you creative freedom to experiment without worrying about “getting it right.”
Tikki Mehndi for Bold Beginners
If you prefer bold looks over delicate lines, tikki style is calling your name. These designs use filled circles and solid shapes that create stunning contrast. The front hand tikki mehndi approach is particularly forgiving because filling shapes is much easier than drawing intricate details.
Here’s a pattern to try: Apply a filled circle on your ring finger tip. Draw a medium-sized filled circle in the center of your palm. Now connect them with a simple curved line—just one line, nothing fancy. Add a few small dots around both circles.
You’ve just created a design that looks deliberate and stylish. The filled shapes anchor everything while the connecting line adds flow. This combination works beautifully and takes maybe fifteen minutes to complete.
Geometric Patterns for Structure Lovers
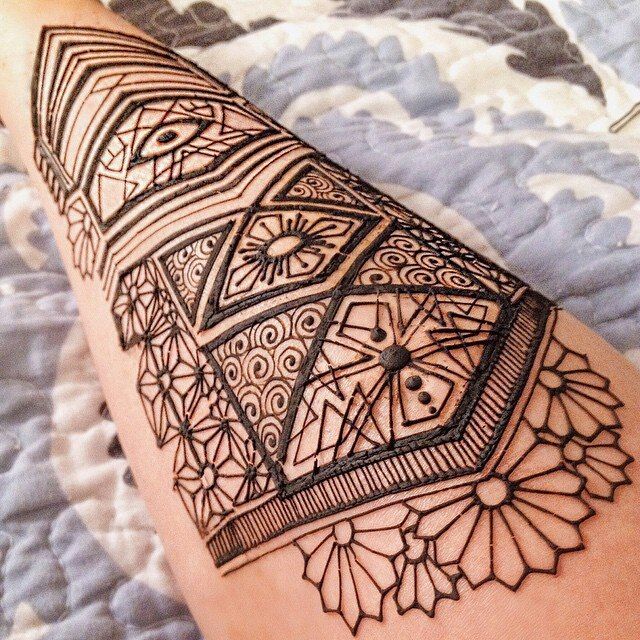
Some people naturally gravitate toward organized, structured designs. If that’s you, geometric patterns will feel comfortable and satisfying. These stylish mehndi ideas use triangles, diamonds, lines, and other shapes to create contemporary looks.
Try drawing a diagonal line across your palm from your thumb base toward your pinky. Along this line, draw small triangles pointing upward. On the other side of the line, draw triangles pointing downward. This creates a lovely chevron pattern that looks complex but isn’t.
Geometric designs also help you develop steady hand control and precision, which benefits all other mehndi styles you’ll try later. Plus, these quick mehndi patterns dry faster because they cover less surface area—perfect when you’re eager to see results.
Modern Mehndi Style That Breaks the Rules
Modern designs mix traditional elements with contemporary aesthetics. You might combine a classic paisley with negative space techniques, or pair traditional vines with minimalist dots. The modern front hand mehndi trend encourages breaking rules and creating something uniquely yours.
This style is wonderful for beginners because there’s no “wrong” way to do it. Want to draw just one large flower with modern linear patterns inside instead of traditional filling? Go for it. Feel like adding unexpected geometric elements to a floral design? That’s perfectly valid.
The creative freedom here reduces pressure while still producing beautiful results. You’re not trying to replicate centuries-old traditional patterns—you’re creating something fresh.
Real Talk About Practice
Let’s be honest—your first attempt probably won’t look Instagram-worthy, and that’s completely okay. I’ve seen my fair share of wonky lines and lopsided flowers. But here’s what I learned: every single attempt teaches you something valuable.
These basic mehndi outlines that look simple when professionals do them actually require muscle memory. Your hand needs to learn the pressure, angle, and flow. This only comes from practice, not from watching tutorials or reading articles (though those help too).
Start practicing on paper or a smooth glass surface. Draw curves, circles, leaves, and petals repeatedly. When these shapes start flowing naturally from your cone, you’re ready to try them on your hand. This preparation makes the actual application so much smoother.
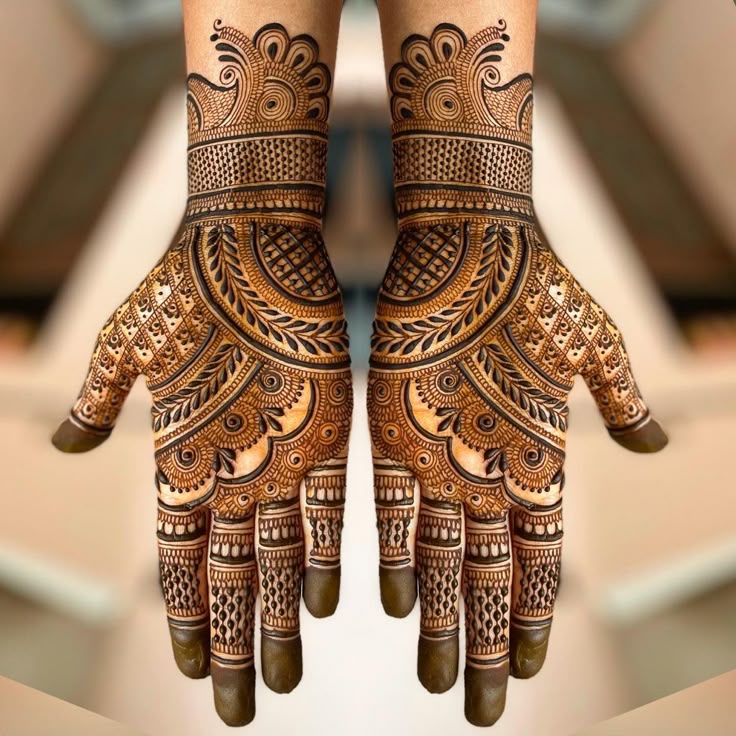
The Secret to Natural-Looking Designs
Want to know something that changed my mehndi game completely? Natural henna pattern designs look best when they follow the natural shape of your hand. Instead of fighting against your hand’s curves and lines, work with them.
Look at your palm right now. See those natural creases and the way your fingers taper? Your design should flow along these lines, not against them. When you respect the natural anatomy of your hand, even the simplest pattern looks harmonious and intentional.
This is why mehndi looks different on everyone—because everyone’s hands are unique. Embrace this instead of trying to replicate someone else’s design exactly.
Why Learning from Experts Matters
I practiced alone for weeks before I took a short lesson from a professional mehndi artist, and I wish I’d done it sooner. That one session corrected several technique issues I didn’t even know I had.
A skilled artist can show you proper cone holding that prevents hand cramping. They demonstrate the ideal paste consistency for smooth flow. They explain why your stain might be coming out lighter than expected and how to fix it. These insights are invaluable.
Many experienced artists now offer beginner workshops or simple group classes. Even watching an artist work in person reveals techniques that videos can’t capture—the subtle wrist movements, the way they rest their hand, the rhythm of their application. Following local mehndi artists also provides continuous learning through their shared tips and tutorials.
Professional guidance doesn’t mean you’re not capable of learning alone. It simply accelerates your progress and helps you avoid common pitfalls that might otherwise discourage you.
Getting Better Color Results
Let me share some practical tips for darker stains, because nothing’s more disappointing than removing your dried mehndi to find barely-there color. After applying your front hand simple mehndi design, resist the urge to remove it quickly.
The paste needs to stay on your skin for at least six hours—overnight is ideal. I know this requires patience, but the color difference is dramatic. When you’re ready to remove it, scrape it off gently rather than washing with water.
Here’s a trick: before removing the dried paste, dab a cotton ball soaked in lemon juice and sugar mixture over your design. This helps seal the color. After removing the paste, avoid water contact for another twelve hours if possible.
Keep your hands warm during the drying process. The heat helps dye molecules absorb better. Some people use clove steam, but honestly, just sitting in a warm room works fine.
Mistakes I Made So You Don’t Have To
Let me save you some frustration by sharing my beginner mistakes. First, I used to apply henna way too thick, thinking more paste meant darker color. Wrong! Thick layers crack before they dry properly and often flake off prematurely. Thin, consistent lines work much better.
I also made the mistake of rushing through designs. Those wobbly lines in my early photos? Yeah, that was impatience. Mehndi rewards slow, steady application. Even easy mehndi designs deserve your time and focus.
Another common error: blowing on wet mehndi to speed up drying. This seems logical but actually causes surface drying while the underneath stays wet, leading to smudges. Just let it air dry naturally, even if it takes longer.
Building Your Skills Gradually
Here’s my advice: don’t try to cover your entire hand in your first few attempts. Start with just one finger. Once that looks good, try two fingers next time. Gradually add a small palm element when you’re ready.
Each practice session builds your confidence and improves your technique. I was amazed at how much better my fourth attempt looked compared to my first. The improvement comes quickly when you practice consistently with simple patterns.
Take photos of each design you create. Seriously, do this. Looking back after a few weeks shows progress that you might not notice day-to-day. It’s incredibly motivating to see how far you’ve come.
Choosing Your First Design
If you’re feeling overwhelmed about where to start, let me make this easy. For your very first attempt, try a simple vine running along one finger with small leaves. That’s it—no palm coverage, no complex elements.
Once that feels comfortable, add a small flower in your palm. Then maybe try finger dots or a simple wrist band. Build slowly rather than attempting a full-hand design right away.
Remember, a front hand simple mehndi design doesn’t mean boring or plain. Simplicity in execution can still create stunning visual impact. Some of the most elegant designs I’ve seen have minimal elements executed beautifully.
Embracing Your Unique Style
As you practice, you’ll naturally develop preferences. Maybe you love flowing curves, or perhaps structured patterns feel more comfortable. Maybe you’ll discover you enjoy mixing styles in unexpected ways. That’s your unique mehndi voice emerging.
Don’t feel pressured to copy anyone else’s style exactly. The most satisfying part of learning mehndi is discovering what feels natural to you. Your designs will eventually carry a personal signature that makes them distinctly yours.
Final Thoughts
Learning to create a beautiful front hand simple mehndi design is genuinely achievable for anyone willing to practice. You don’t need artistic talent or years of experience. You just need patience, the right starter patterns, and permission to make mistakes along the way.
The designs I’ve shared here are the same ones that helped me fall in love with mehndi art. They’re forgiving enough for shaky first attempts but beautiful enough to make you feel accomplished. Start with whichever pattern calls to you, and remember that every expert was once a beginner holding their first cone.
Your mehndi journey doesn’t have to be perfect—it just has to start. Pick up that cone, choose one simple design, and create something beautiful today.
Frequently Asked Questions
What’s the easiest mehndi design for complete beginners?
A single vine with leaves along one finger works perfectly.
How can I make my mehndi color darker?
Keep the paste on overnight and avoid water for twelve hours.
Should I practice on paper before my hand?
Yes, paper practice builds confidence and improves cone control significantly.
Why does my mehndi look patchy after drying?
Uneven pressure or inconsistent paste thickness causes patchy results usually.
Can I fix mistakes while the henna is wet?
Wait until completely dry, then gently scratch off the error carefully.

hi