Henna art has been bringing joy and beauty to celebrations for centuries, and among all the styles available today, Arabic mehndi continues to win hearts everywhere. If you’ve ever admired those gorgeous, flowing patterns and thought they looked too difficult to try, think again. Easy Arabic Mehndi Designs are actually some of the most forgiving and beginner-friendly options out there, and they look absolutely stunning when done right.
Let me walk you through everything you need to know about creating beautiful Arabic henna designs, whether you’re preparing for your best friend’s wedding, getting ready for a festival, or just want to treat yourself to some artistic self-care.
Why Arabic Mehndi Is Different From Other Styles
You might be wondering what sets Arabic henna apart from the other styles you’ve seen. The main difference is in the overall approach. While some mehndi traditions focus on covering every inch of skin with detailed patterns, gulf style mehndi takes a different route—it’s all about creating impact with bold, clear designs and plenty of breathing room.
Here’s a quick comparison to help you understand:
| Feature | Arabic Style | Traditional Indian Style |
| Coverage | Partial, with open spaces | Dense, full coverage |
| Line Thickness | Bold and thick | Fine and delicate |
| Main Elements | Large florals, leaves | Paisleys, mandalas, peacocks |
| Application Time | 30-60 minutes | 2-4 hours |
| Best For | Modern, casual looks | Traditional ceremonies |
This table shows why Easy Arabic Mehndi Designs work so well for busy lifestyles. You get maximum beauty with minimum time investment.
What Makes These Designs So Beginner-Friendly?
Let’s be honest—not everyone has a steady hand or hours to spend practicing intricate patterns. That’s where arabic mehndi patterns really shine. The style forgives small mistakes because the designs aren’t meant to be perfect or symmetrical in a rigid way. They flow organically, which means if one petal is slightly larger than another, it actually adds to the natural, handcrafted charm.
The bold outlines also help beginners tremendously. When you’re working with thicker lines, you have better control over the henna cone, and any slight wobbles are less noticeable. Plus, those open spaces I mentioned? They’re not just aesthetic choices—they give you natural break points where you can pause, assess your work, and continue without worrying about connecting every single element perfectly.
Breaking Down the Essential Elements
Before you start creating full designs, it helps to understand the basic building blocks. Think of these as your mehndi vocabulary—once you know these elements, you can mix and match them to create countless variations.
Key Design Elements:
- Large flowers – These are your showstoppers, usually placed in the center of the palm or back of the hand
- Curved vines – Flowing lines that connect different elements and create movement
- Leaf shapes – Simple pointed ovals that fill spaces and add texture
- Dots and circles – Perfect for adding detail without complicated work
- Geometric shapes – Triangles, squares, and diamond patterns for modern touches
- Spiral curls – Decorative endings that give designs a finished look
When you combine these elements using simple arabic henna ideas, you can create designs that look complex but are actually quite straightforward to execute.
Designs Perfect for Different Occasions
One of the best things about Easy Arabic Mehndi Designs is how adaptable they are. Let me break down some options based on where you’re headed:
For Casual Gatherings and Daily Wear
Sometimes you just want a little something special without going overboard. Try these approaches:
- A single large flower on the back of your hand with minimal vine work
- Finger-only designs that look like delicate rings or bands
- Small wrist bracelets created with arabic mehndi for beginners techniques
- Corner designs that cover just the outer edge of your hand
These take 15-20 minutes to apply and last several days, giving you that decorated feeling without major commitment.
For Festivals and Holiday Celebrations
Eid, Diwali, Christmas parties, or New Year celebrations call for something a bit more special. This is where you can explore modern arabic henna designs that balance tradition with contemporary style:
- Bold Outline Style designs that cover your palm with 3-5 large floral motifs
- Half-hand coverage focusing on either the palm or the back
- Matching ankle designs if you’re wearing sandals or open shoes
- Coordinating simple patterns on both hands for balanced beauty
For Weddings and Formal Events
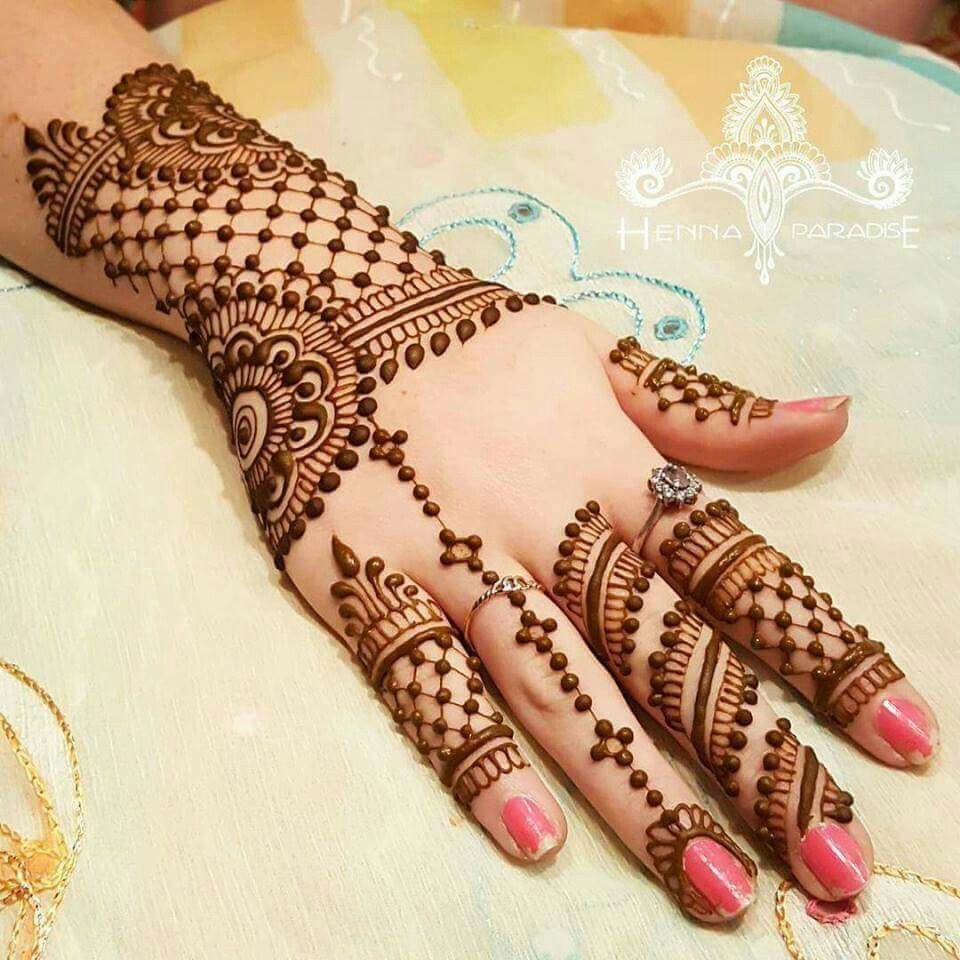
When the occasion is extra special, your mehndi can reflect that. Arabic bridal mehndi takes the basic concepts and amplifies them:
- Full-hand coverage extending from fingertips to wrists
- Arabic trail mehndi that travels up the forearm
- Detailed floral arabic mehndi with layered petals and shading
- Matching foot designs that complement your hand patterns
Even for bridal applications, Easy Arabic Mehndi Designs maintain that characteristic openness and flow rather than becoming overly dense.
Step-by-Step Guide for Your First Design
Let me walk you through creating a simple but impressive design. This works great for your first attempt:
Step 1: Prepare Your Canvas
- Wash hands thoroughly with soap
- Avoid applying lotion or oil
- Keep paper towels handy for any mistakes
Step 2: Create Your Focal Point
- Draw a large flower in the center of your palm (about 2 inches across)
- Use bold lines—don’t be timid
- Make 5-7 petals radiating from a center circle
Step 3: Add Supporting Elements
- Draw a curved vine from your flower toward your wrist
- Add 2-3 smaller flowers along this vine
- Include simple leaf shapes between flowers
Step 4: Work on the Fingers
- Create simple designs on 2-3 fingers (not all five)
- Try basic lines, dots, or small floral tips
- Leave some fingers bare for that Arabic aesthetic
Step 5: Fill Empty Spaces
- Add dots in clusters of 3 or 5
- Draw small leaves pointing outward from main elements
- Create tiny spiral curls at vine endings
This approach gives you a complete, balanced design without overwhelming yourself with detail.
Understanding Half-Hand Designs
Half-hand arabic mehndi has become incredibly popular because it offers a sweet spot between minimal and elaborate. Essentially, you’re decorating either the palm-side or back-side of your hand, but not both. This gives you gorgeous results with half the effort.
Advantages of Half-Hand Designs:
| Benefit | Why It Matters |
| Faster application | Great when you’re short on time |
| Easier to manage | Less chance of smudging while drying |
| Still looks complete | Doesn’t appear unfinished or incomplete |
| Practical | Keeps one side of hand free for tasks |
| Perfect for practice | Build skills before attempting full coverage |
I particularly love palm-side designs because they’re more visible when you’re gesturing or holding things, but back-side patterns photograph beautifully and show well when your hands are resting.
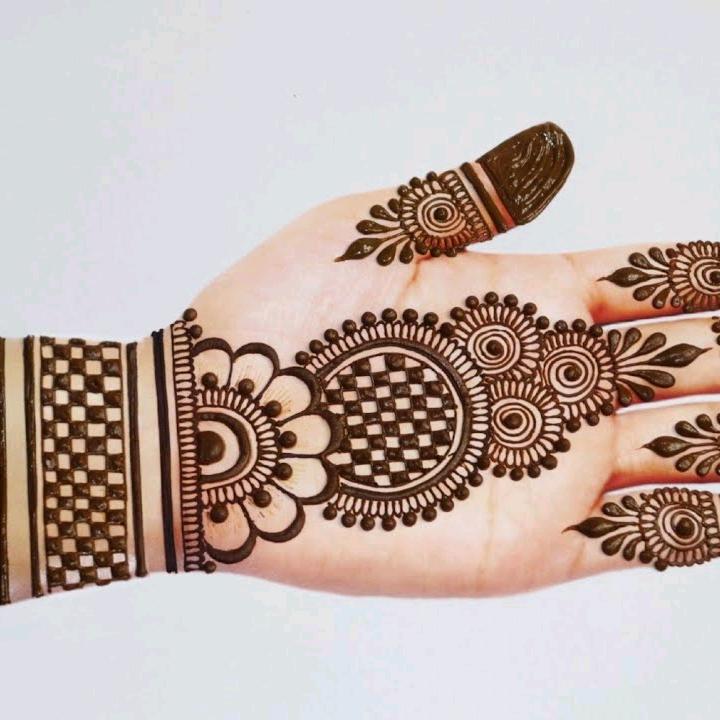
The Secret to Beautiful Floral Patterns
Since flowers are the backbone of Easy Arabic Mehndi Designs, let’s talk about making them look their best. The trick isn’t in making perfect petals—it’s in creating dimension and interest.
Start with your center circle, then add petals around it. Here’s the key: don’t make all petals the same size. Vary them slightly—some longer, some wider. This creates a more natural, organic look. Inside each petal, you can add a simple line or leave them empty. The choice is yours, and both options look great.
For Arabic Floral Patterns that really pop, try this layering technique: create your base flower with 5-6 large petals, then add a second layer of smaller petals peeking out between the first layer. Finish with dots or small tear-drop shapes around the outer edge. This three-layer approach creates depth without requiring advanced skills.
Creating Flowing Trail Designs
Trail Mehndi Style sounds fancy, but it’s really just about connecting your design elements in a flowing path. Think of it as telling a story with your henna—there’s a beginning, middle, and end, all connected by a visual journey.
Start at your wrist with a medium-sized flower or leaf cluster. From there, draw a gently curving line toward your middle or ring finger. Along this main vine, place 2-4 flowers decreasing in size as you move upward. Between flowers, add leaves pointing alternately left and right. End at the fingertip with a small spiral or final tiny flower.
The beauty of bold arabic outlines in trail designs is that the thick lines themselves become decorative elements. You’re not just creating pathways—you’re making bold statements that stand alone as design features.
Working With a Professional Artist
Even though Easy Arabic Mehndi Designs are totally manageable for DIY attempts, there’s something special about having a professional mehndi artist work their magic. I’ve tried both approaches, and here’s what I’ve noticed about professional applications.
Experienced artists bring years of muscle memory to their work. Their lines are consistently smooth, their pressure on the cone is perfectly calibrated, and they instinctively know where to place elements for maximum visual impact. When you watch them work, you pick up techniques that would take months to discover on your own—like how to hold the cone at the optimal angle, how to create uniform dots, or how to smoothly transition between thick and thin lines.
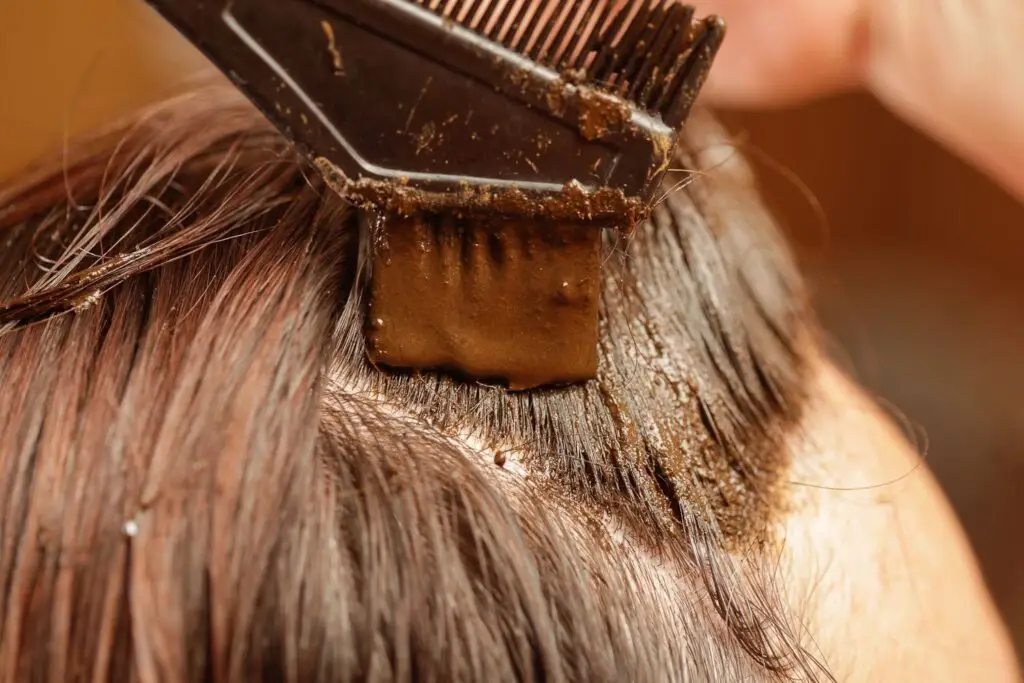
Beyond technique, professionals understand henna chemistry. They know exactly how to prepare paste that gives deep, long-lasting color. They’ve tested ratios of lemon juice, sugar, and essential oils to find combinations that work best for different skin types and climates. This knowledge translates to stains that develop into rich, dark tones and last up to two weeks instead of fading after just a few days.
For those exploring arabic mehndi patterns for the first time, sitting with a skilled artist provides an education you can’t get from videos alone. You can ask questions in real-time, understand why certain design choices work better than others, and see how professionals troubleshoot when something doesn’t go as planned. It’s an investment in your own learning journey.
Aftercare Tips That Actually Work
You’ve created a beautiful design—now let’s make sure it develops the darkest, longest-lasting stain possible. Here’s what actually makes a difference:
Immediate Aftercare (First 6-12 Hours):
- Let the paste dry completely before touching anything
- Wrap gently with tissue and medical tape if needed
- Sleep with paste on for deepest color
- Avoid water completely during this phase
After Removing Dried Paste:
- Scrape off gently with a butter knife or credit card edge
- Apply a mixture of lemon juice and sugar with a cotton ball
- Let this mixture dry naturally on the design
- Still avoid water for another 12 hours if possible
Long-Term Maintenance:
- Apply natural oils (coconut, olive, or mustard) before washing
- Pat dry instead of rubbing with towels
- Avoid harsh soaps and exfoliating scrubs
- Limit swimming pool and hot tub exposure
Following these steps can extend your mehndi’s life from one week to nearly two weeks, keeping those gorgeous arabic mehndi patterns looking fresh and vibrant.
Common Mistakes and How to Avoid Them
Let me save you some frustration by pointing out the mistakes I see most often:
Mistake #1: Making Lines Too Thin Arabic style requires confidence. Thin, tentative lines look incomplete. Practice applying steady pressure for those characteristic bold strokes.
Mistake #2: Filling Every Space Remember, negative space is your friend. If your design looks crowded, you’ve probably overdone it.
Mistake #3: Ignoring Hand Anatomy Designs should follow the natural curves and contours of your hand. Work with your hand’s shape, not against it.
Mistake #4: Using Old or Poor-Quality Henna Fresh henna paste makes all the difference. If your cone has been sitting in the fridge for months or the paste smells off, start with a fresh one.
Mistake #5: Rushing the Drying Process Patience pays off. Keep that paste on as long as possible, even if it feels inconvenient.
Quick Reference: Design Complexity Levels
Here’s a helpful breakdown based on your experience:
| Level | Time Needed | Recommended Designs | Key Features |
| Total Beginner | 15-20 mins | Single flower, finger bands, wrist bracelet | 1-2 main elements, minimal details |
| Some Practice | 30-40 mins | Half-hand patterns, simple trails | 3-4 connected elements, basic shading |
| Comfortable | 45-60 mins | Full palm coverage, arm trails | Multiple flowers, detailed leaves, patterns |
| Advanced | 60-90 mins | Bridal styles, full arms | Complex layering, fine details, extensive coverage |
Start where you’re comfortable and work your way up. There’s no rush—Easy Arabic Mehndi Designs are meant to be enjoyable, not stressful.
FAQ Section
Q: How long before an event should I apply mehndi?
A: Apply one to two days before for darkest color development.
Q: Can I shower with fresh mehndi on my hands?
A: No, wait at least twelve hours after removing the paste.
Q: Do Easy Arabic Mehndi Designs work on feet too?
A: Absolutely, they look beautiful on feet and ankles especially.
Q: What if I make a mistake while applying?
A: Quickly wipe with damp cotton swab before paste dries completely.
Q: Why isn’t my mehndi stain getting dark?
A: Quality of henna, application time, and aftercare all affect darkness.